Beautiful Broken Canoe
Looking back on two years of repairs - the story of Steve and Eila's canoe (part 3)
There is a certain beauty in objects that have been visibly repaired.
The ‘lack’ of perfection draws you in. What story of attachment or necessity can explain the painstaking care that is evident in mended objects? To me, it speaks of love, thriftiness, and stewardship.
In looking at brightly embroidered patches on a garment, or delicate golden veins on a piece of pottery that’s been repaired kintsugi style, I become aware of the fine line between useful function and utter disrepair. It’s a poignant reminder that nothing in this life is permanent.
In a world littered with ever increasing numbers of disposable products, engineered to pass in and out of our lives without a second thought, a broken and repaired object is proof that it is still possible to pay attention. It is still possible to look after our things, repair them when they break, give or sell them to someone else when we no longer use them, or salvage and recycle the materials when that object eventually does pass beyond repair.
When Steve and I first built our canoe, we envisioned it becoming something that would remain in our family for many years, perhaps getting passed on to the next generation. To witness the canoe get blasted apart only 6 months after completing its construction was devastating. Nonetheless, we decided to do our best to bring the canoe back to life.
This week, Steve and I are drawing to the close of what has been a two year journey to repair our canoe. After this round of restoration, I think we can safely say:
Come hell or high-water, we will maintain stewardship over this canoe for many years yet to come.
Let’s take a look at the work we did to fix our canoe.
The damage
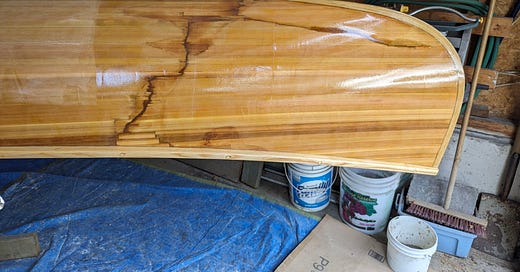
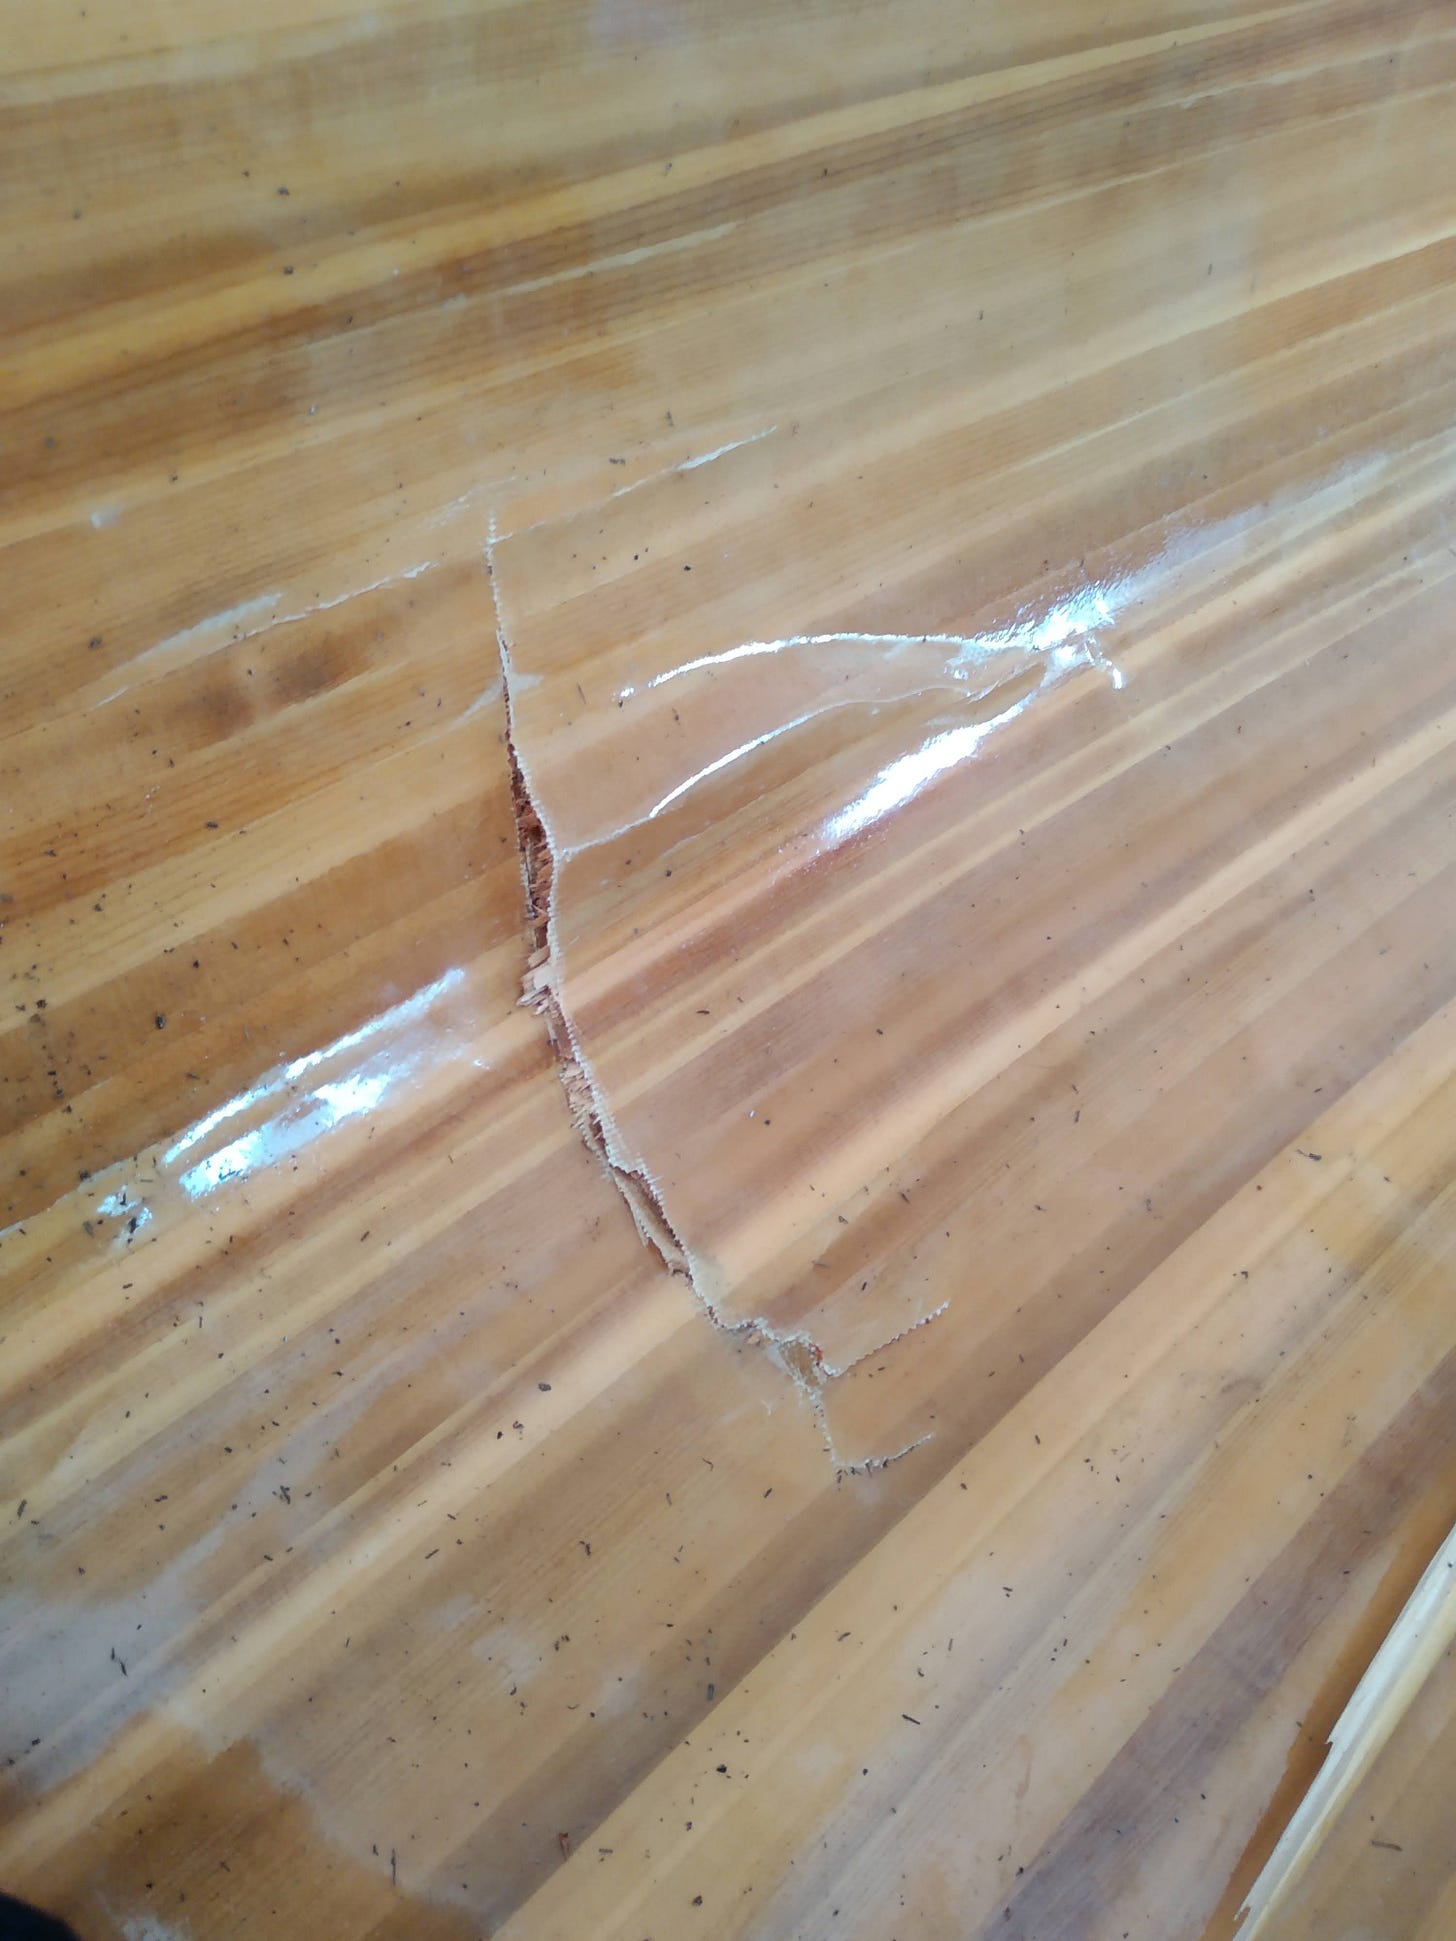
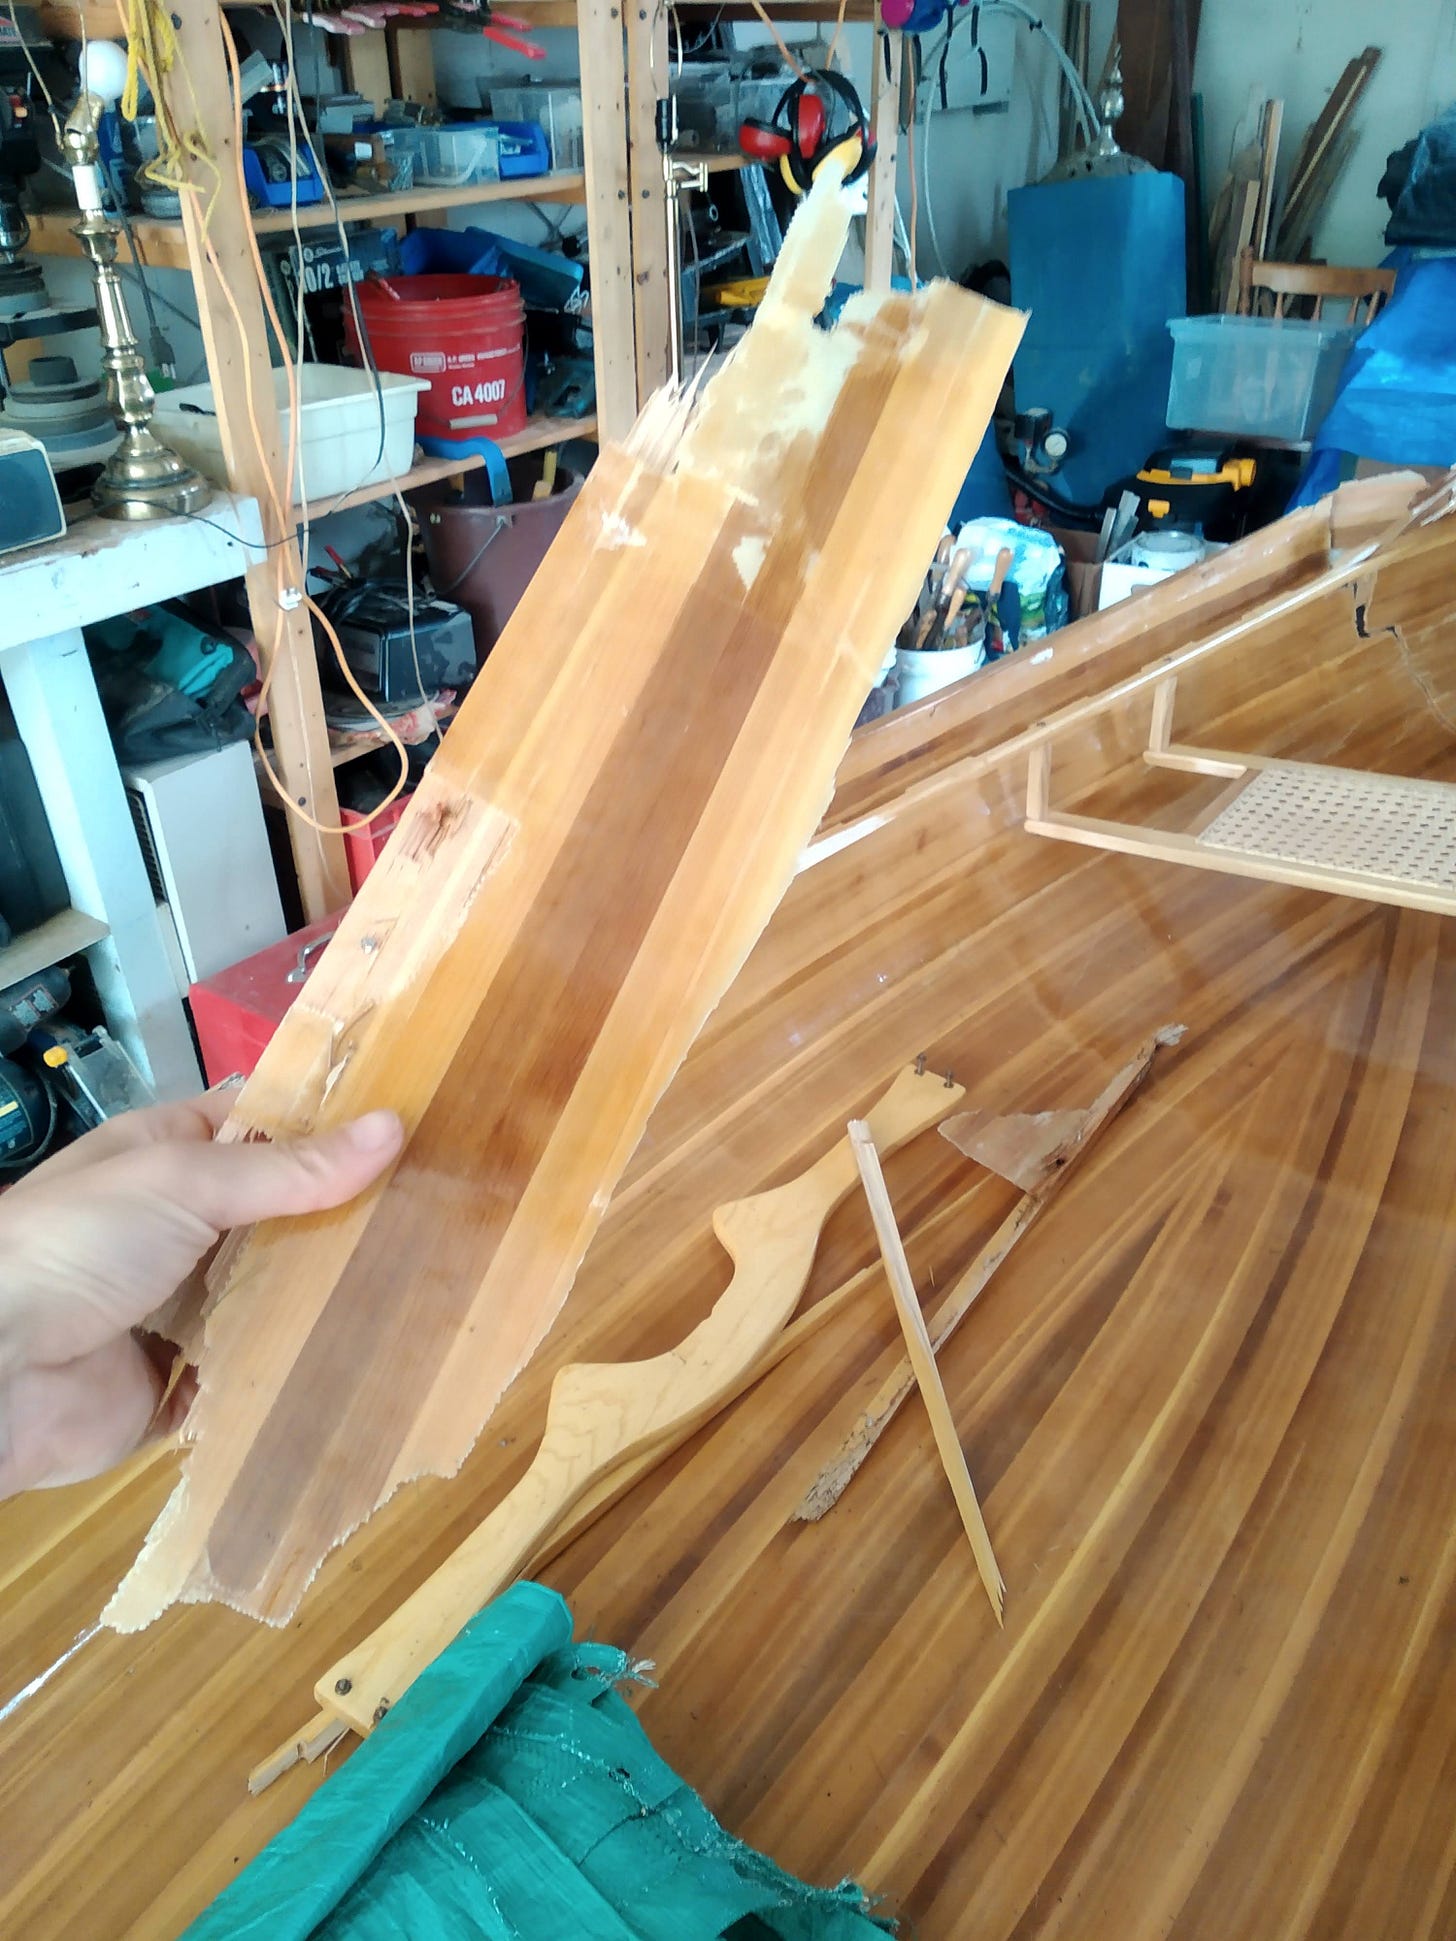
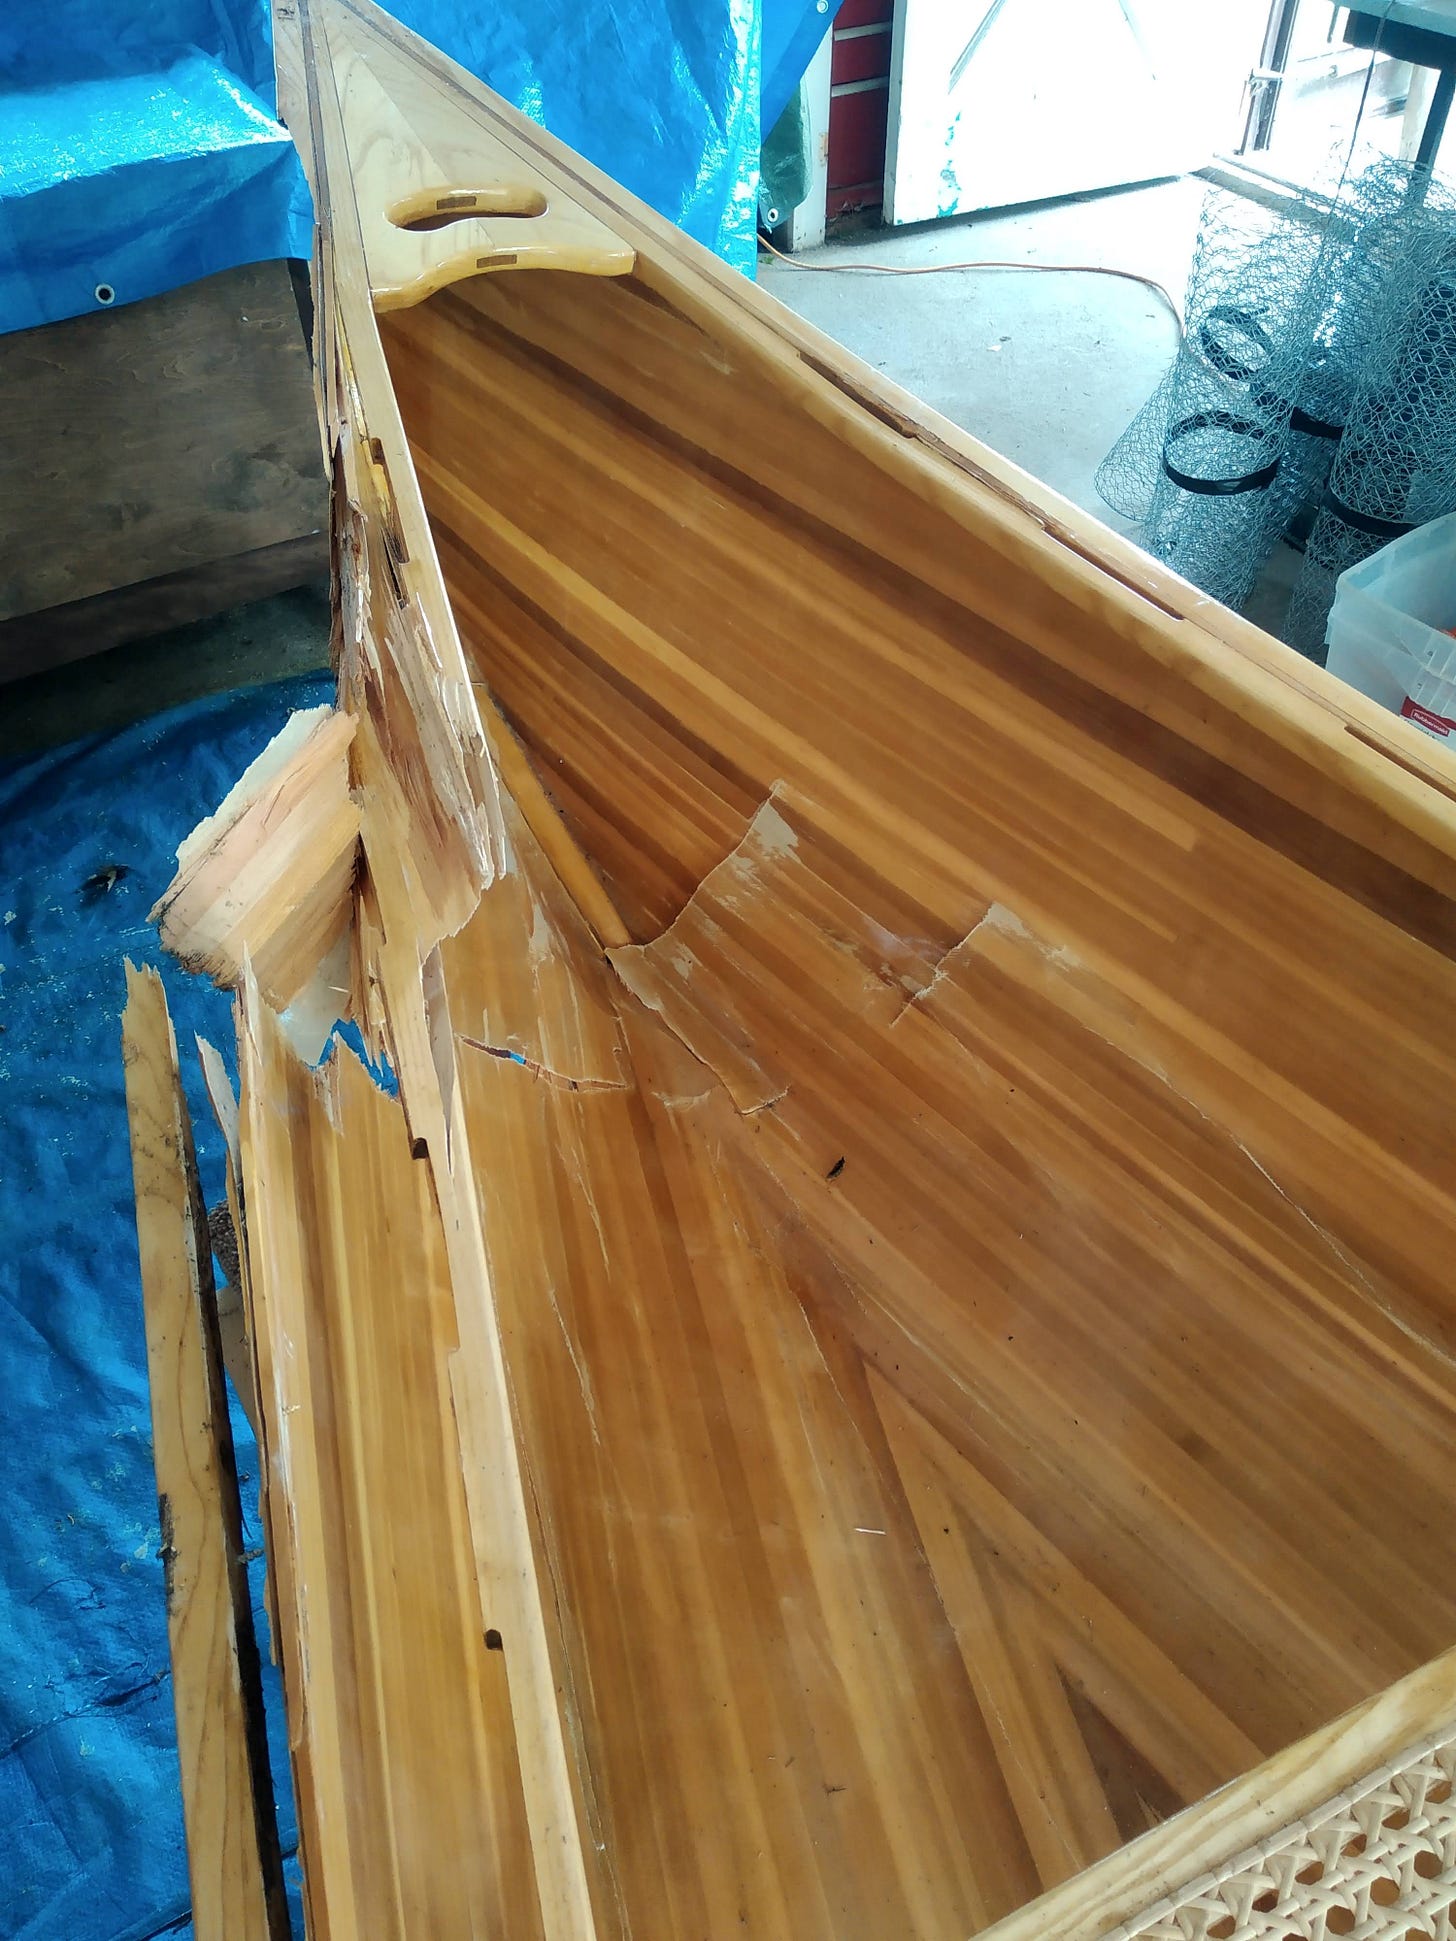
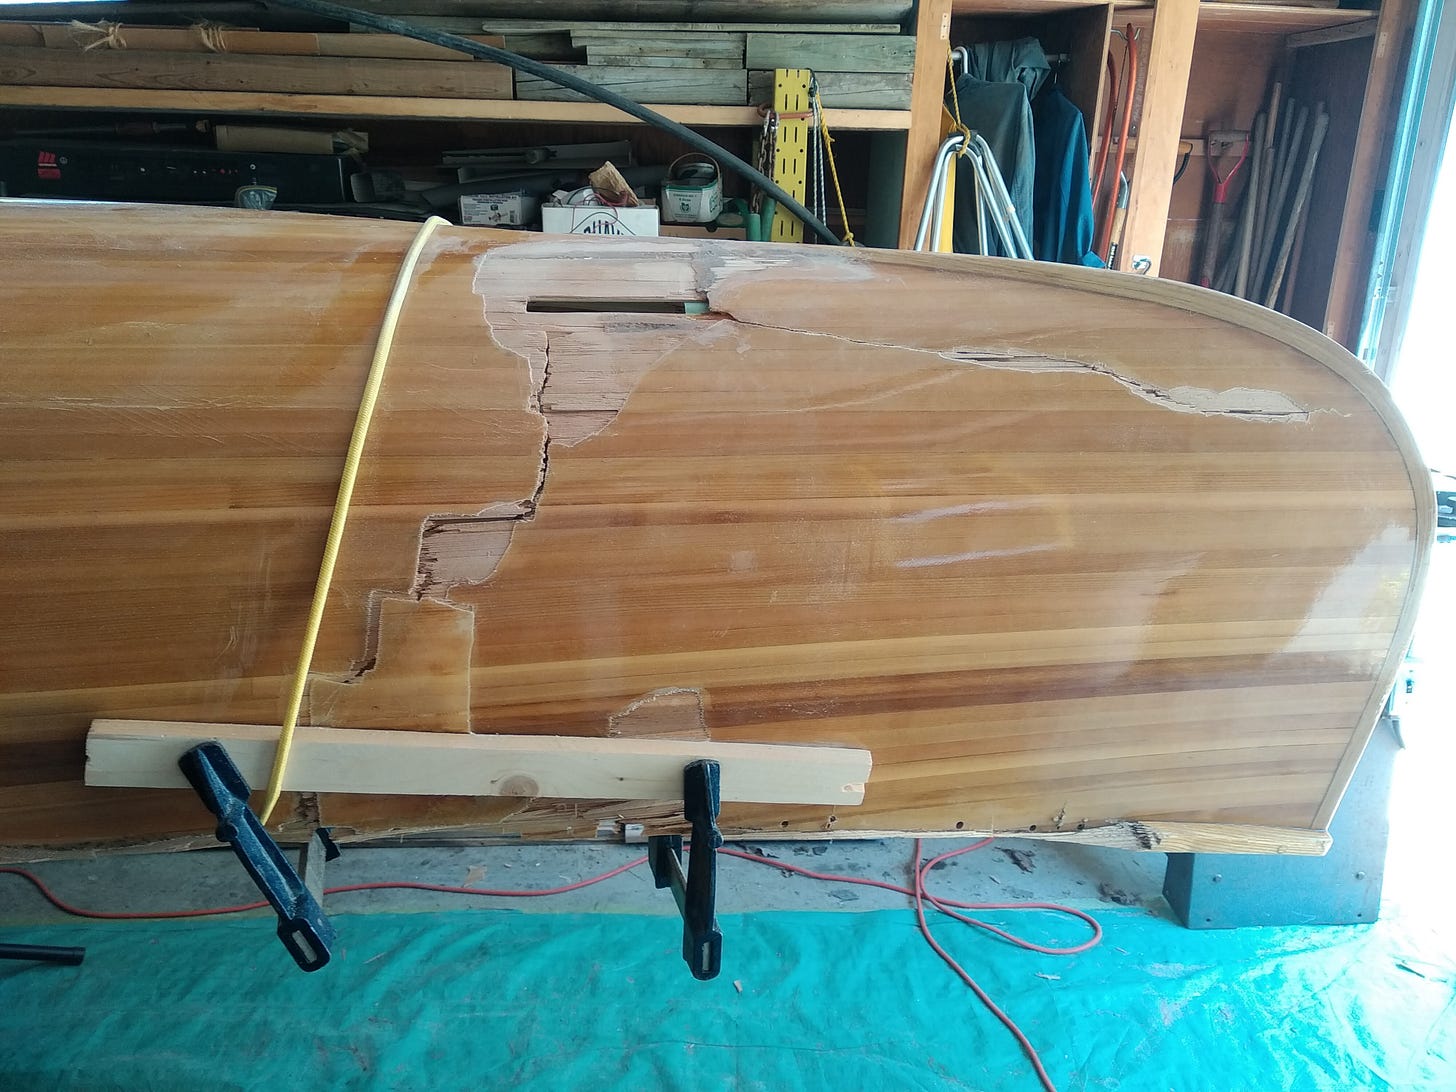
The canoe had multiple holes punched into its hull. The gunnels were shattered. A big chunk of the sidewall got ripped out from where the yoke used to be attached. The worst damage was at the bow. It had been three quarters of the way ripped off, leaving only the upper half of the starboard sidewall keeping it attached to the rest of the canoe.
When we built the canoe, we followed a manual with instructions for every step of the way. But there was no manual for fixing a canoe damaged like ours was. We were in uncharted waters, and had to use our own methods and intuitions to get it back together.
Rebuilding the hull
The first step to repair the canoe was getting the hull back into one piece. There were painful parts to this. We peeled off the fibreglass wherever it had become delaminated from the wood, so that we would have room to work on the shattered cedar beneath.
We plugged the holes in the hull using a mixture of sawdust and epoxy.
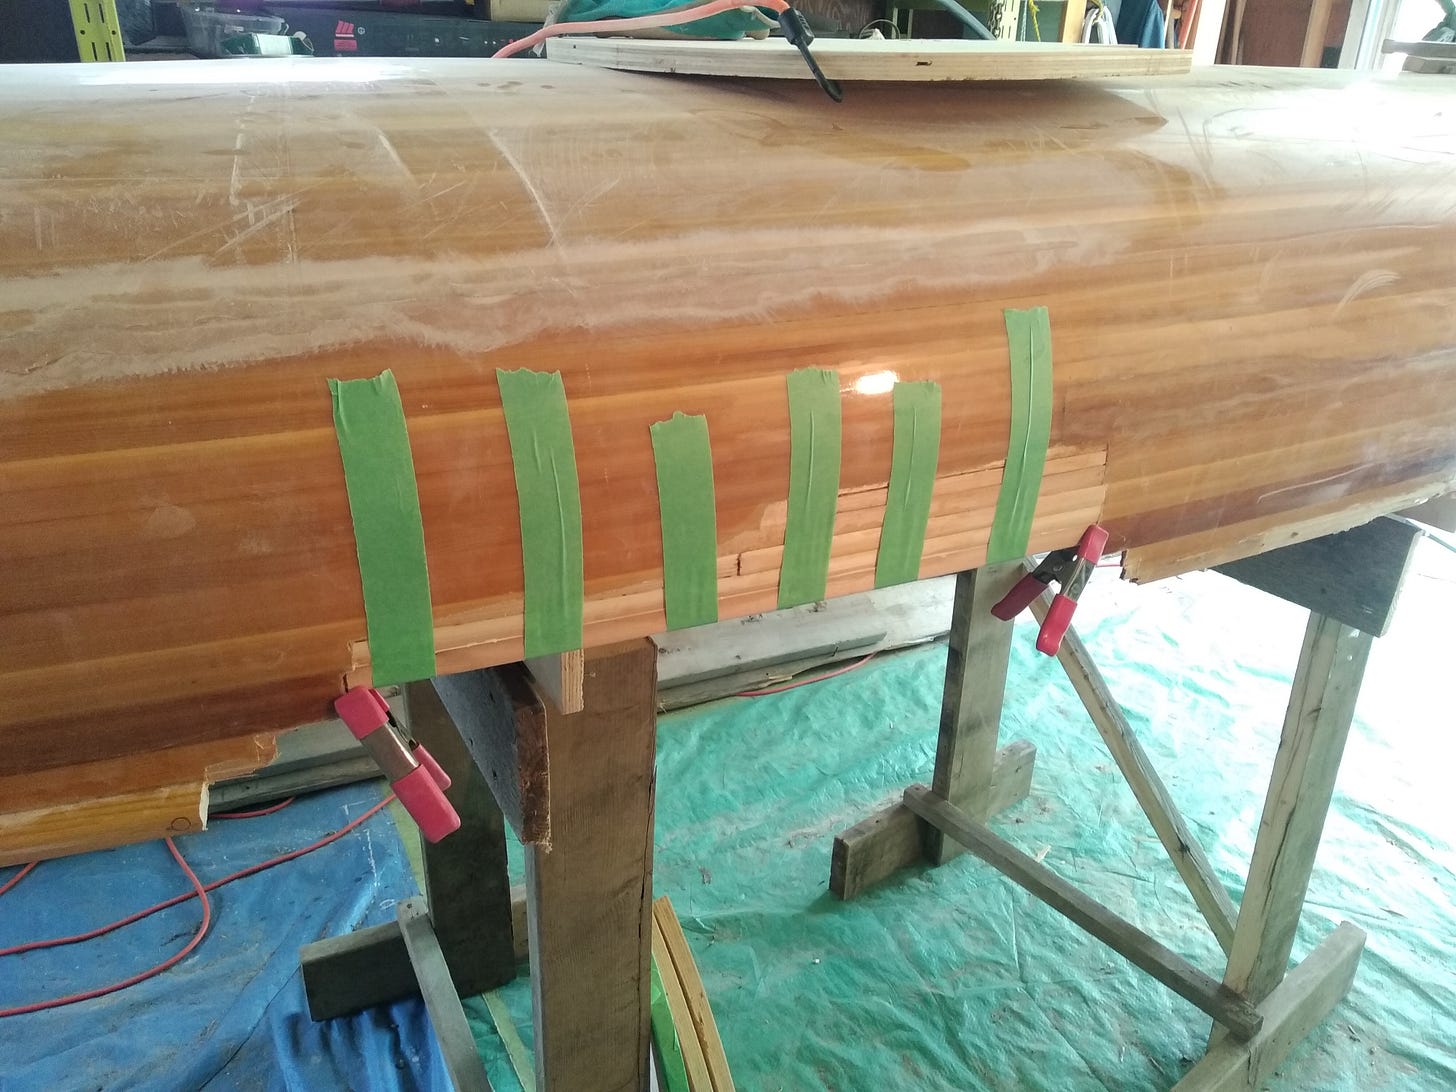
Where the chunk of sidewall got ripped out, I rebuilt the wall one strip at a time, using leftover cedar strips from the original build. I would trim a strip to size, apply a line of wood glue, tape it in place, and leave it for a day to set before removing the tape and glueing in the next strip. It took multiple weekends to rebuild this part of the hull.
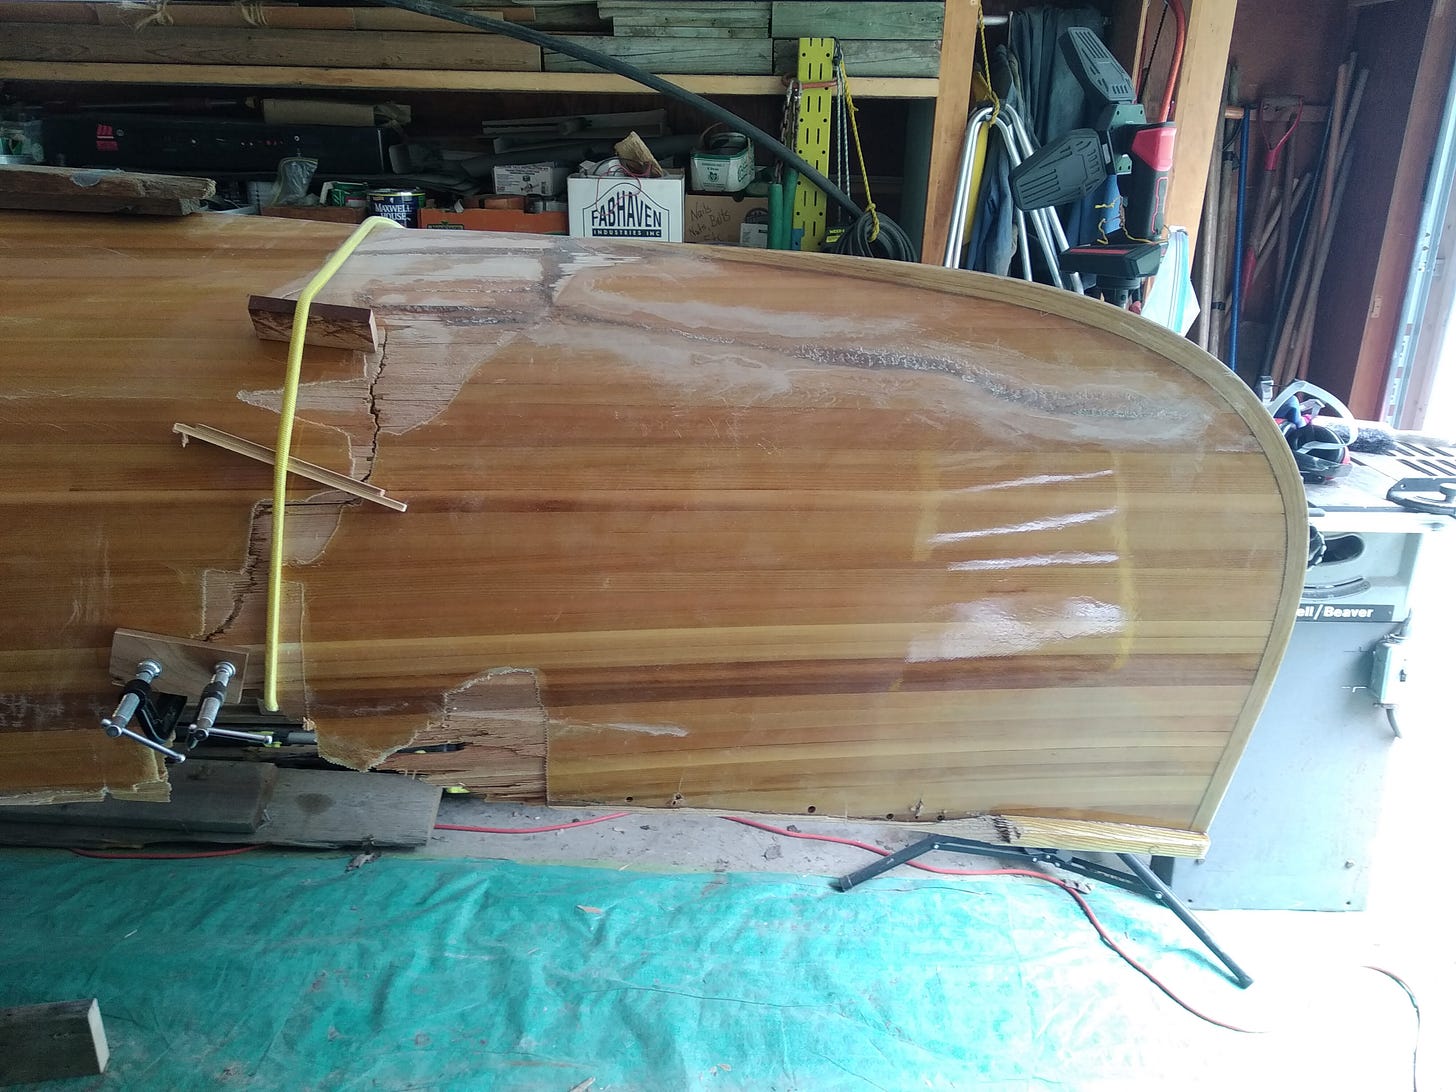
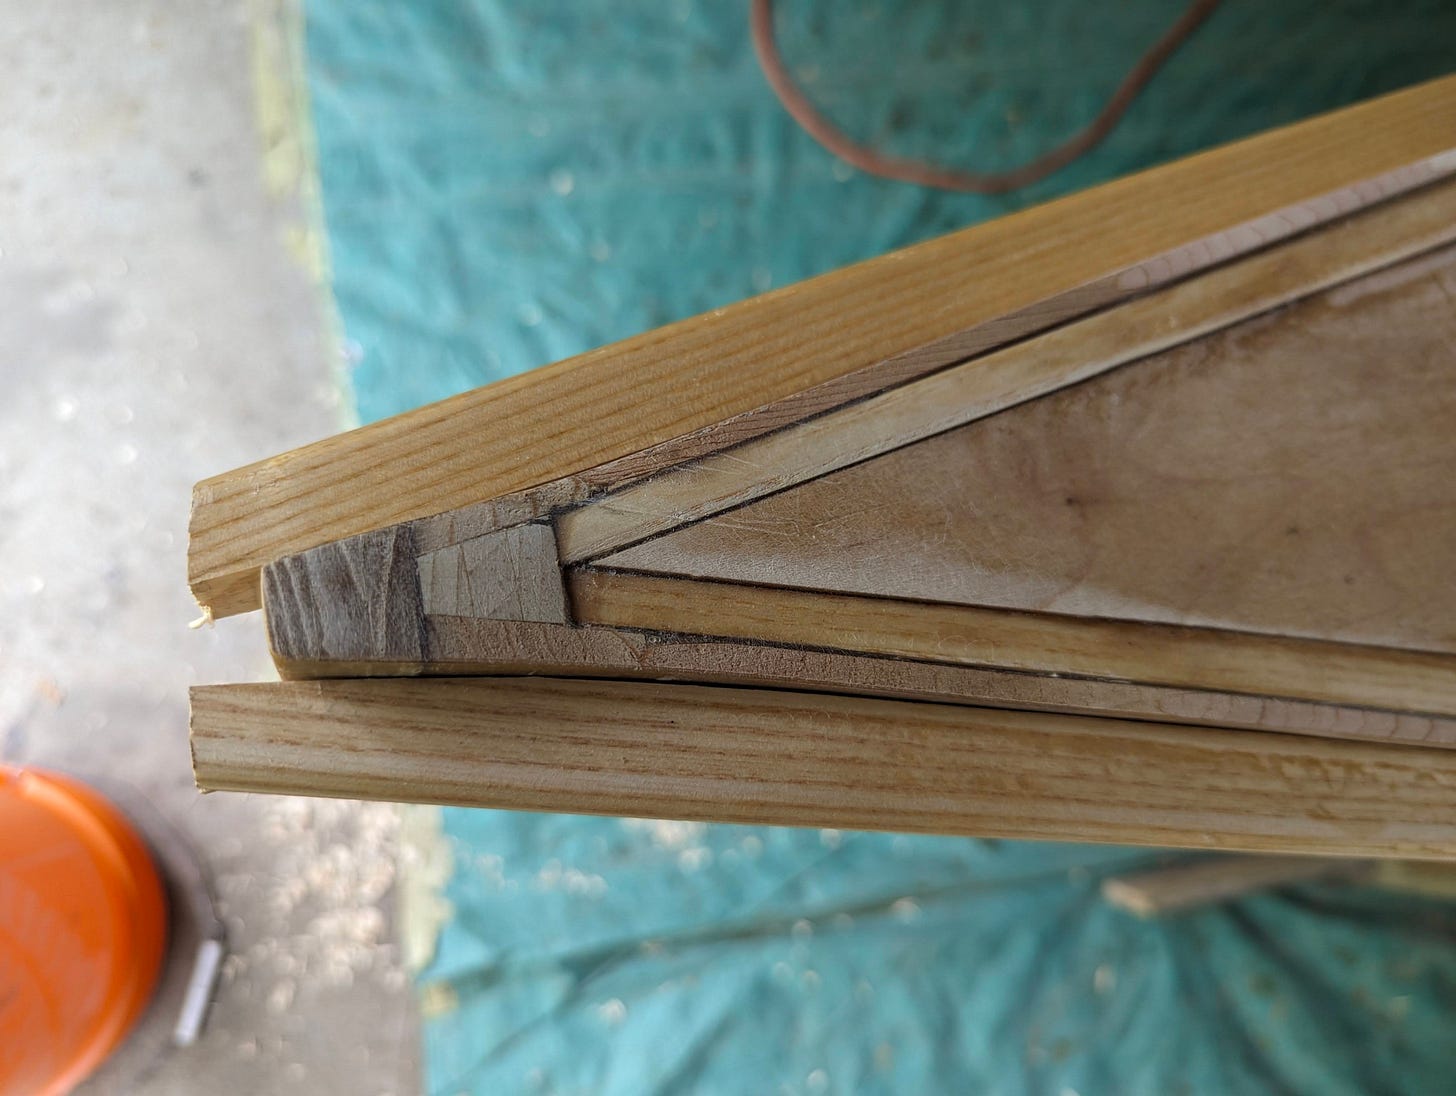
The most involved repair was at the bow. We started on the starboard side, and worked our way up and over, using many jigs to pull the boat back into alignment. We glued up cracks with epoxy and sawdust, and rebuilt missing chunks with wood glue and fresh cedar strips as required. The work was done in small batches, letting a fix for a portion of the damage cure overnight before moving on to the next section and adjusting the jigs as required.
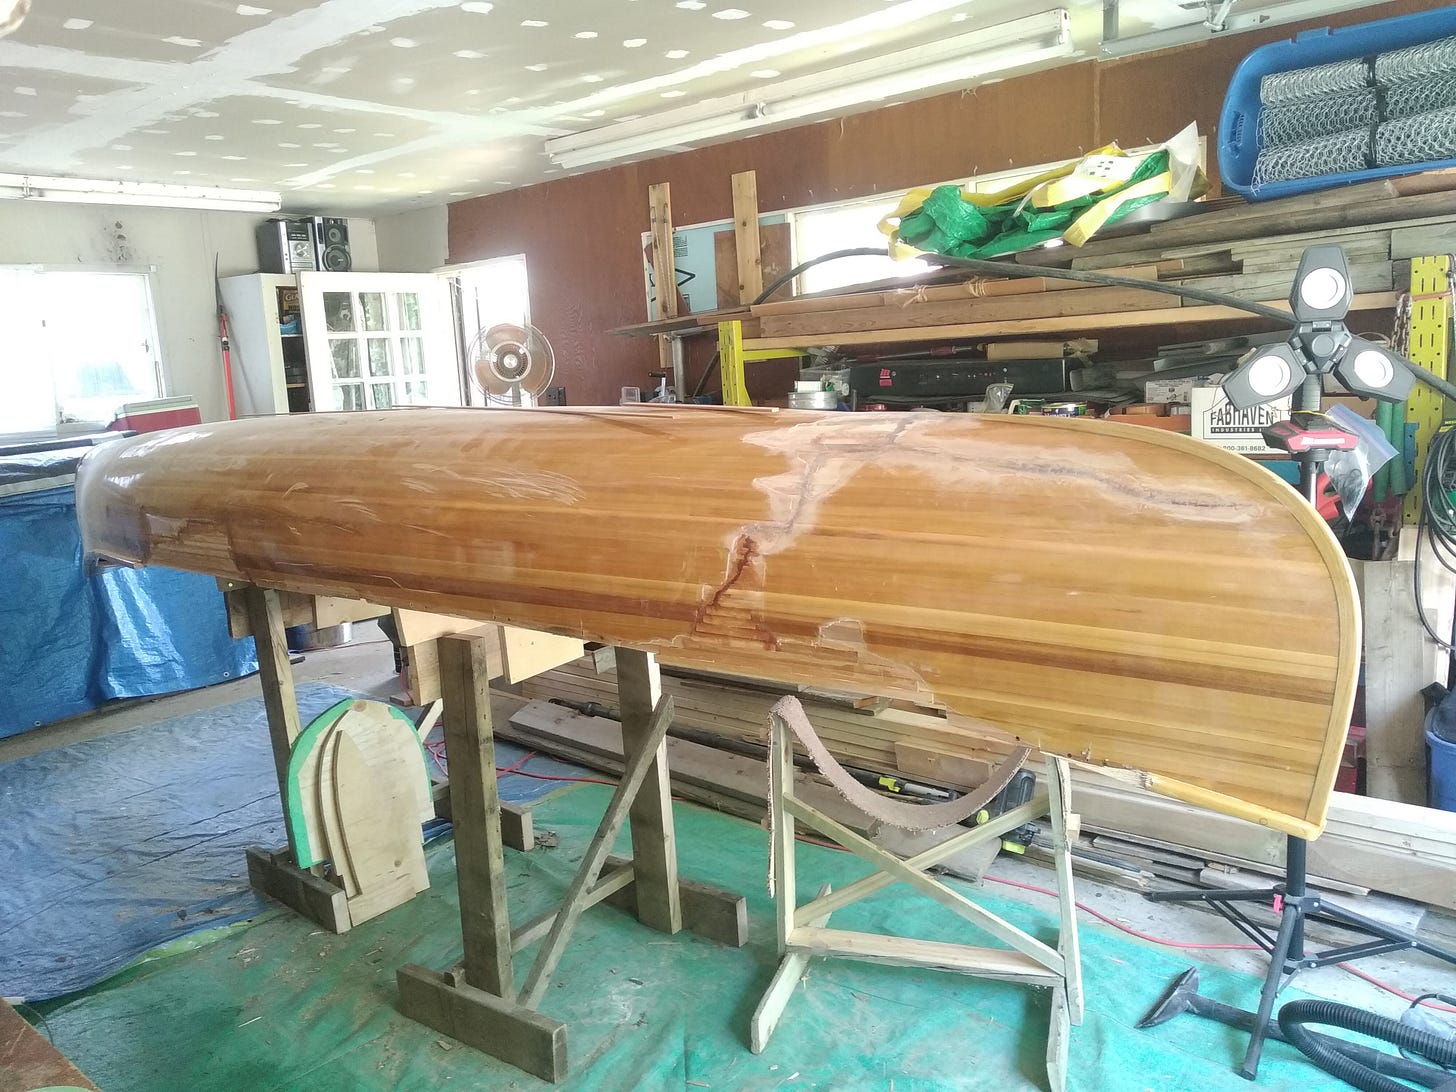
Repairing the hull took us the entire summer of 2022. By the time we were done, the canoe was reasonably back in one piece. All the holes were glued shut and prepped for fibreglass patches.
Fibreglass Patches
The work of 2023 was to do a fibreglass patch any weekend that we were able to get to the cottage. It was a busy summer, with us visiting friends in Nova Scotia, attending weddings in Calgary, and planning for our own wedding in October! Altogether we did not have much time to work on the canoe.
Nevertheless, the repairs steadily marched on.
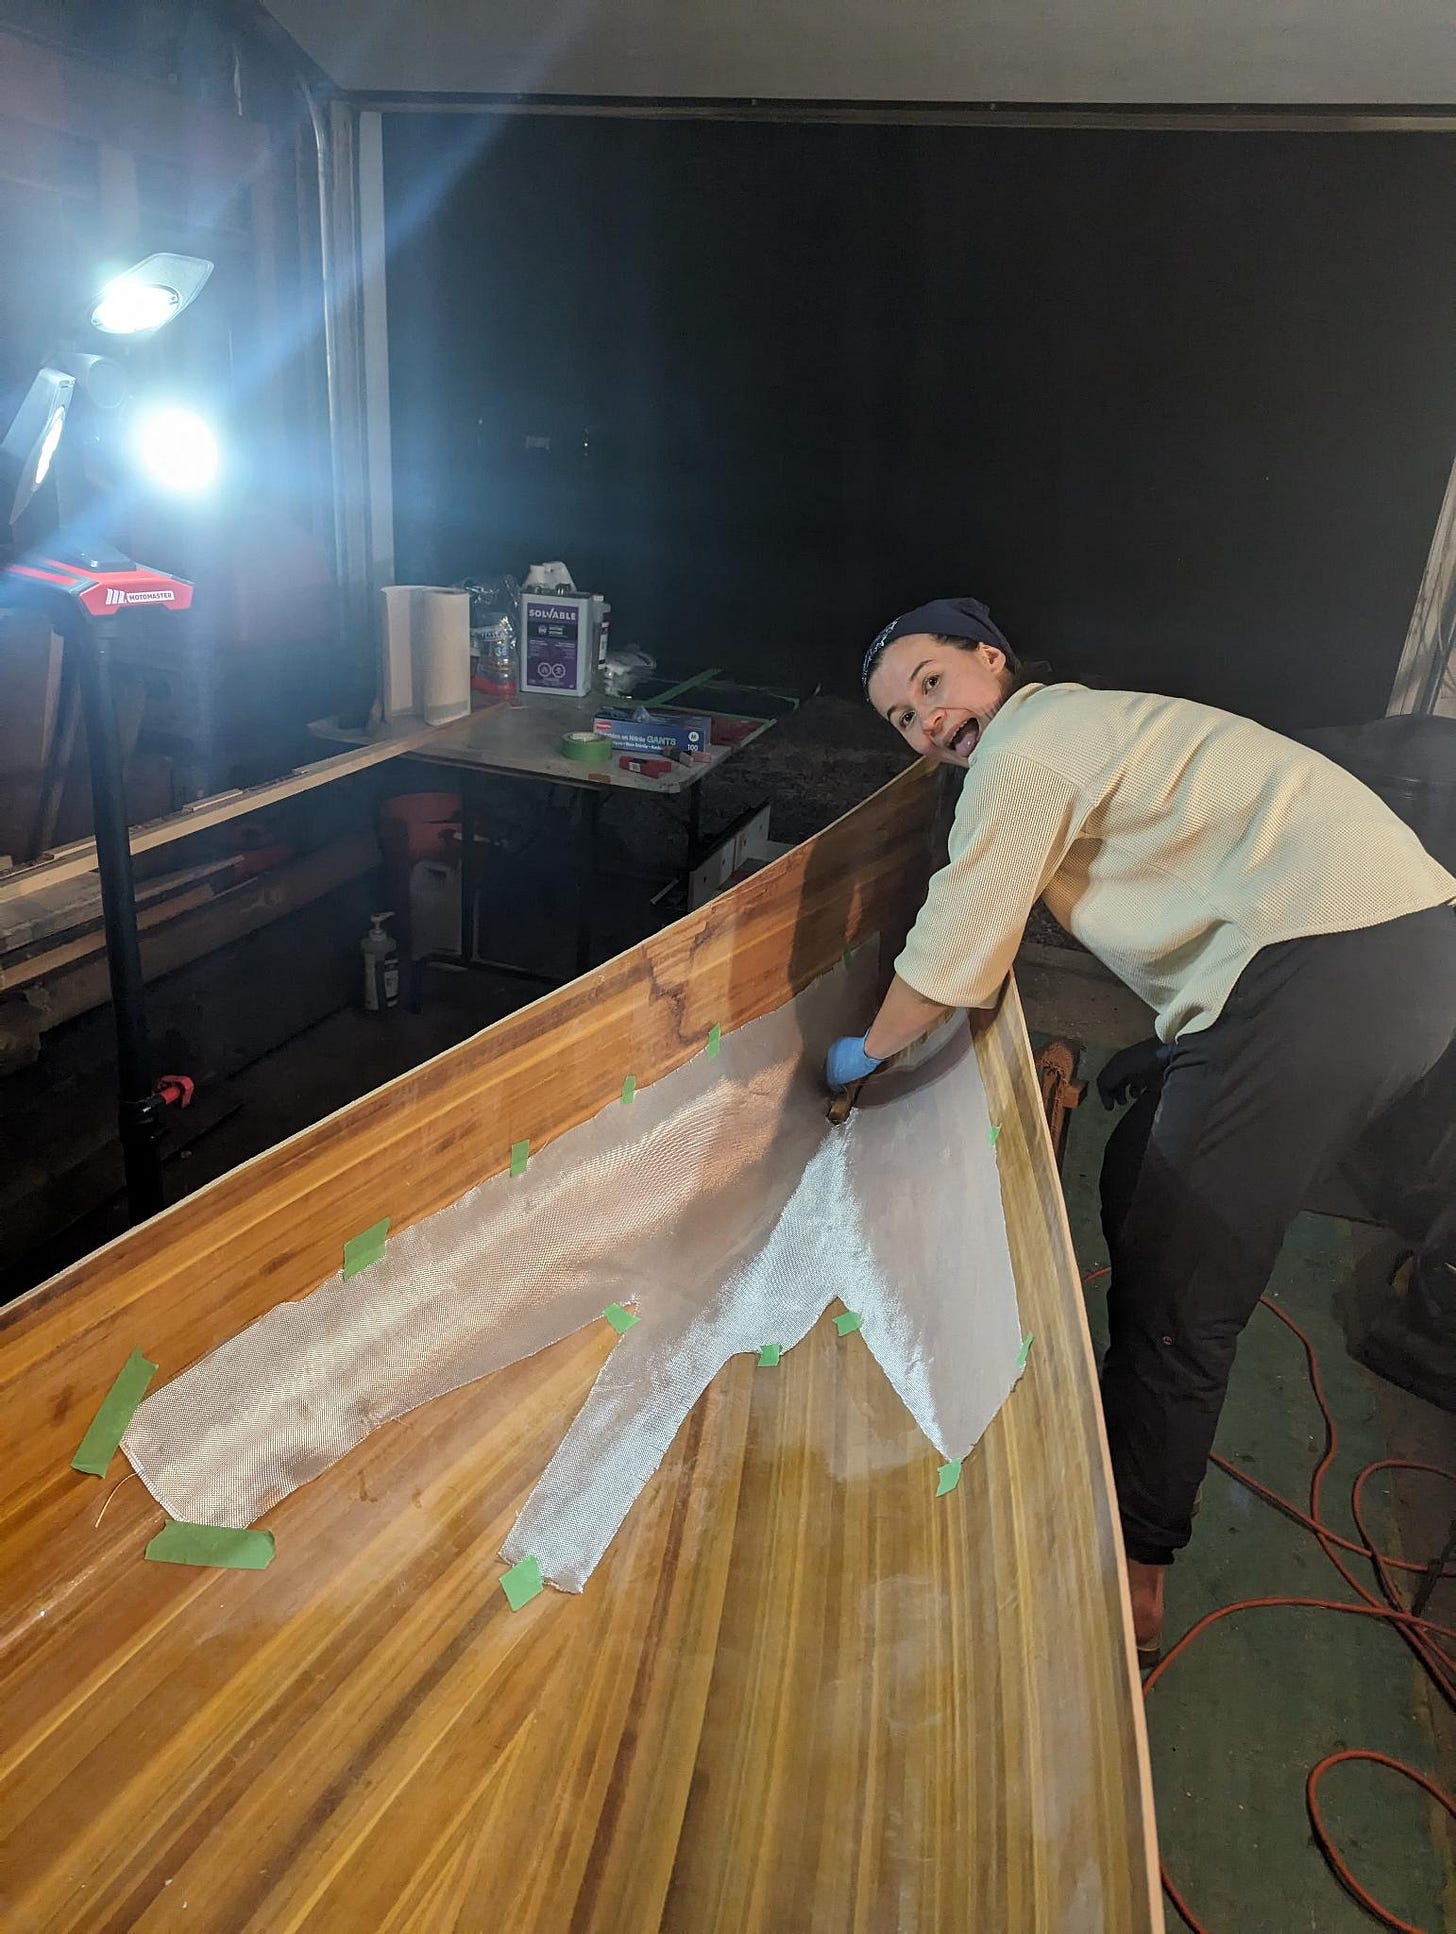
A fibreglass patch requires a full day. First, the surface is prepped - sanded with 120grit, then wiped clean with acetone to remove any dust. The fibreglass sheet is cut to the right size and laid over the area that needs to be patched. Next, we mix our 2-part epoxy and apply it to the fibreglass, fully wetting it out. Excess epoxy is squeegeed out, and the patch is left to cure for about three hours, until it’s tacky to the touch. Another coat is applied while the epoxy is still green. Then again, another coat after the epoxy has cured another three hours. Each patch receives 3 or 4 coats, all spread out at least 3 hours from each other, making for a 12 hour day.
First we patched the exterior of the hull. Then, we flipped the canoe, sanded and filled the interior surfaces so that we could patch the inside too.
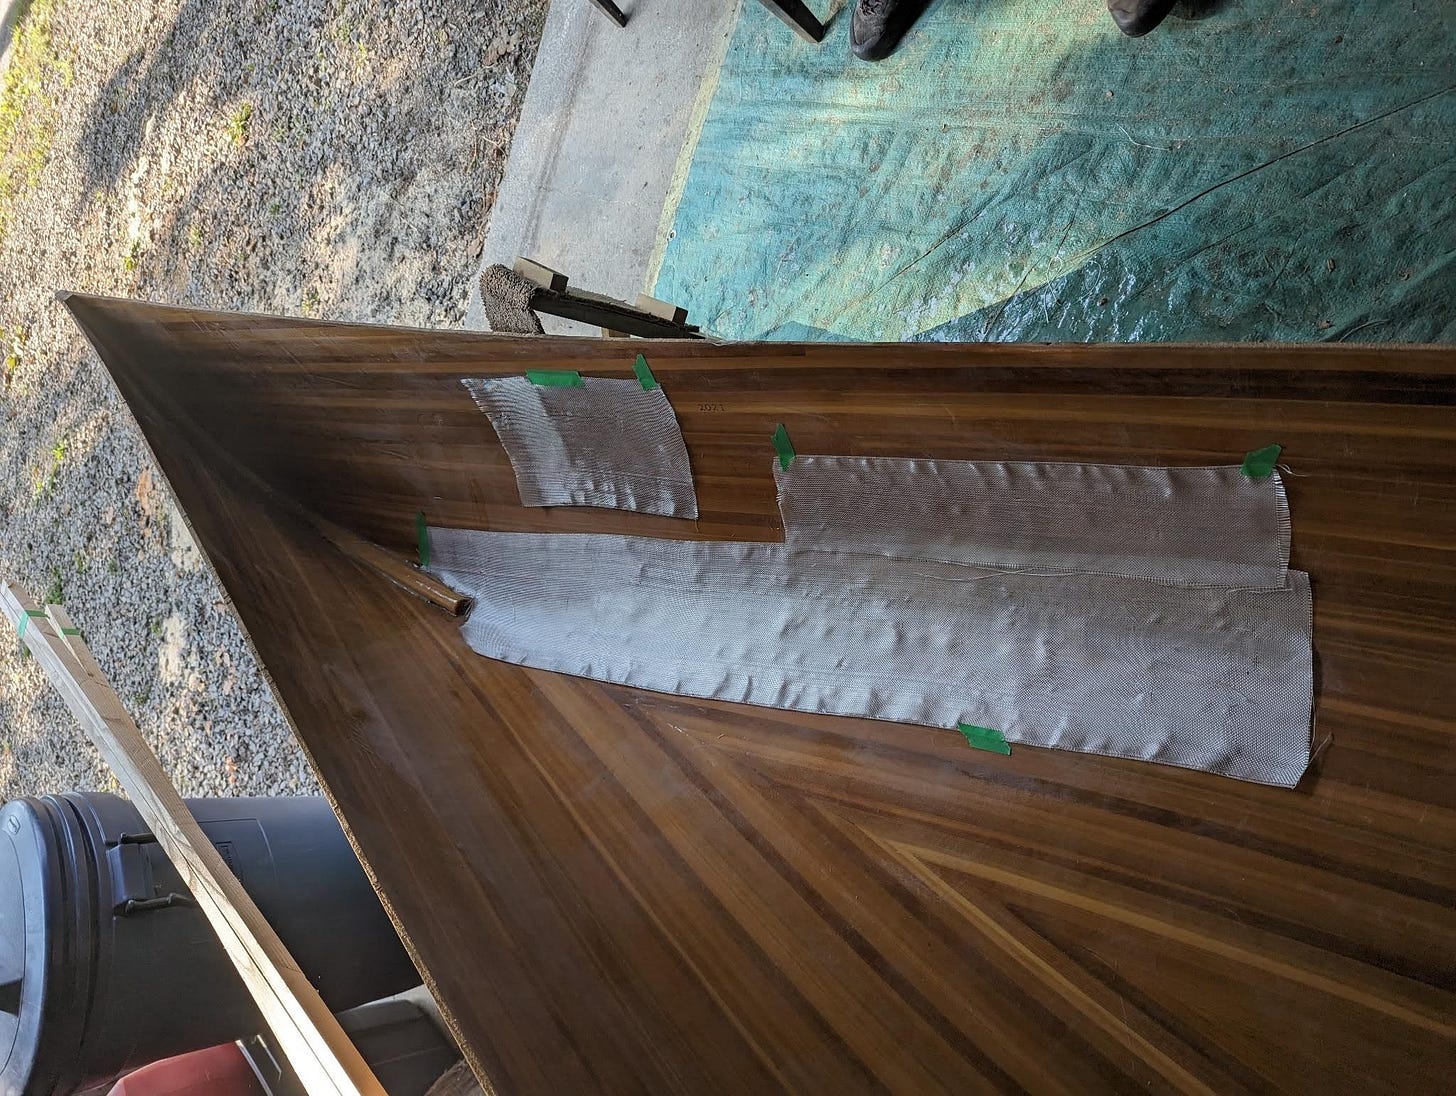
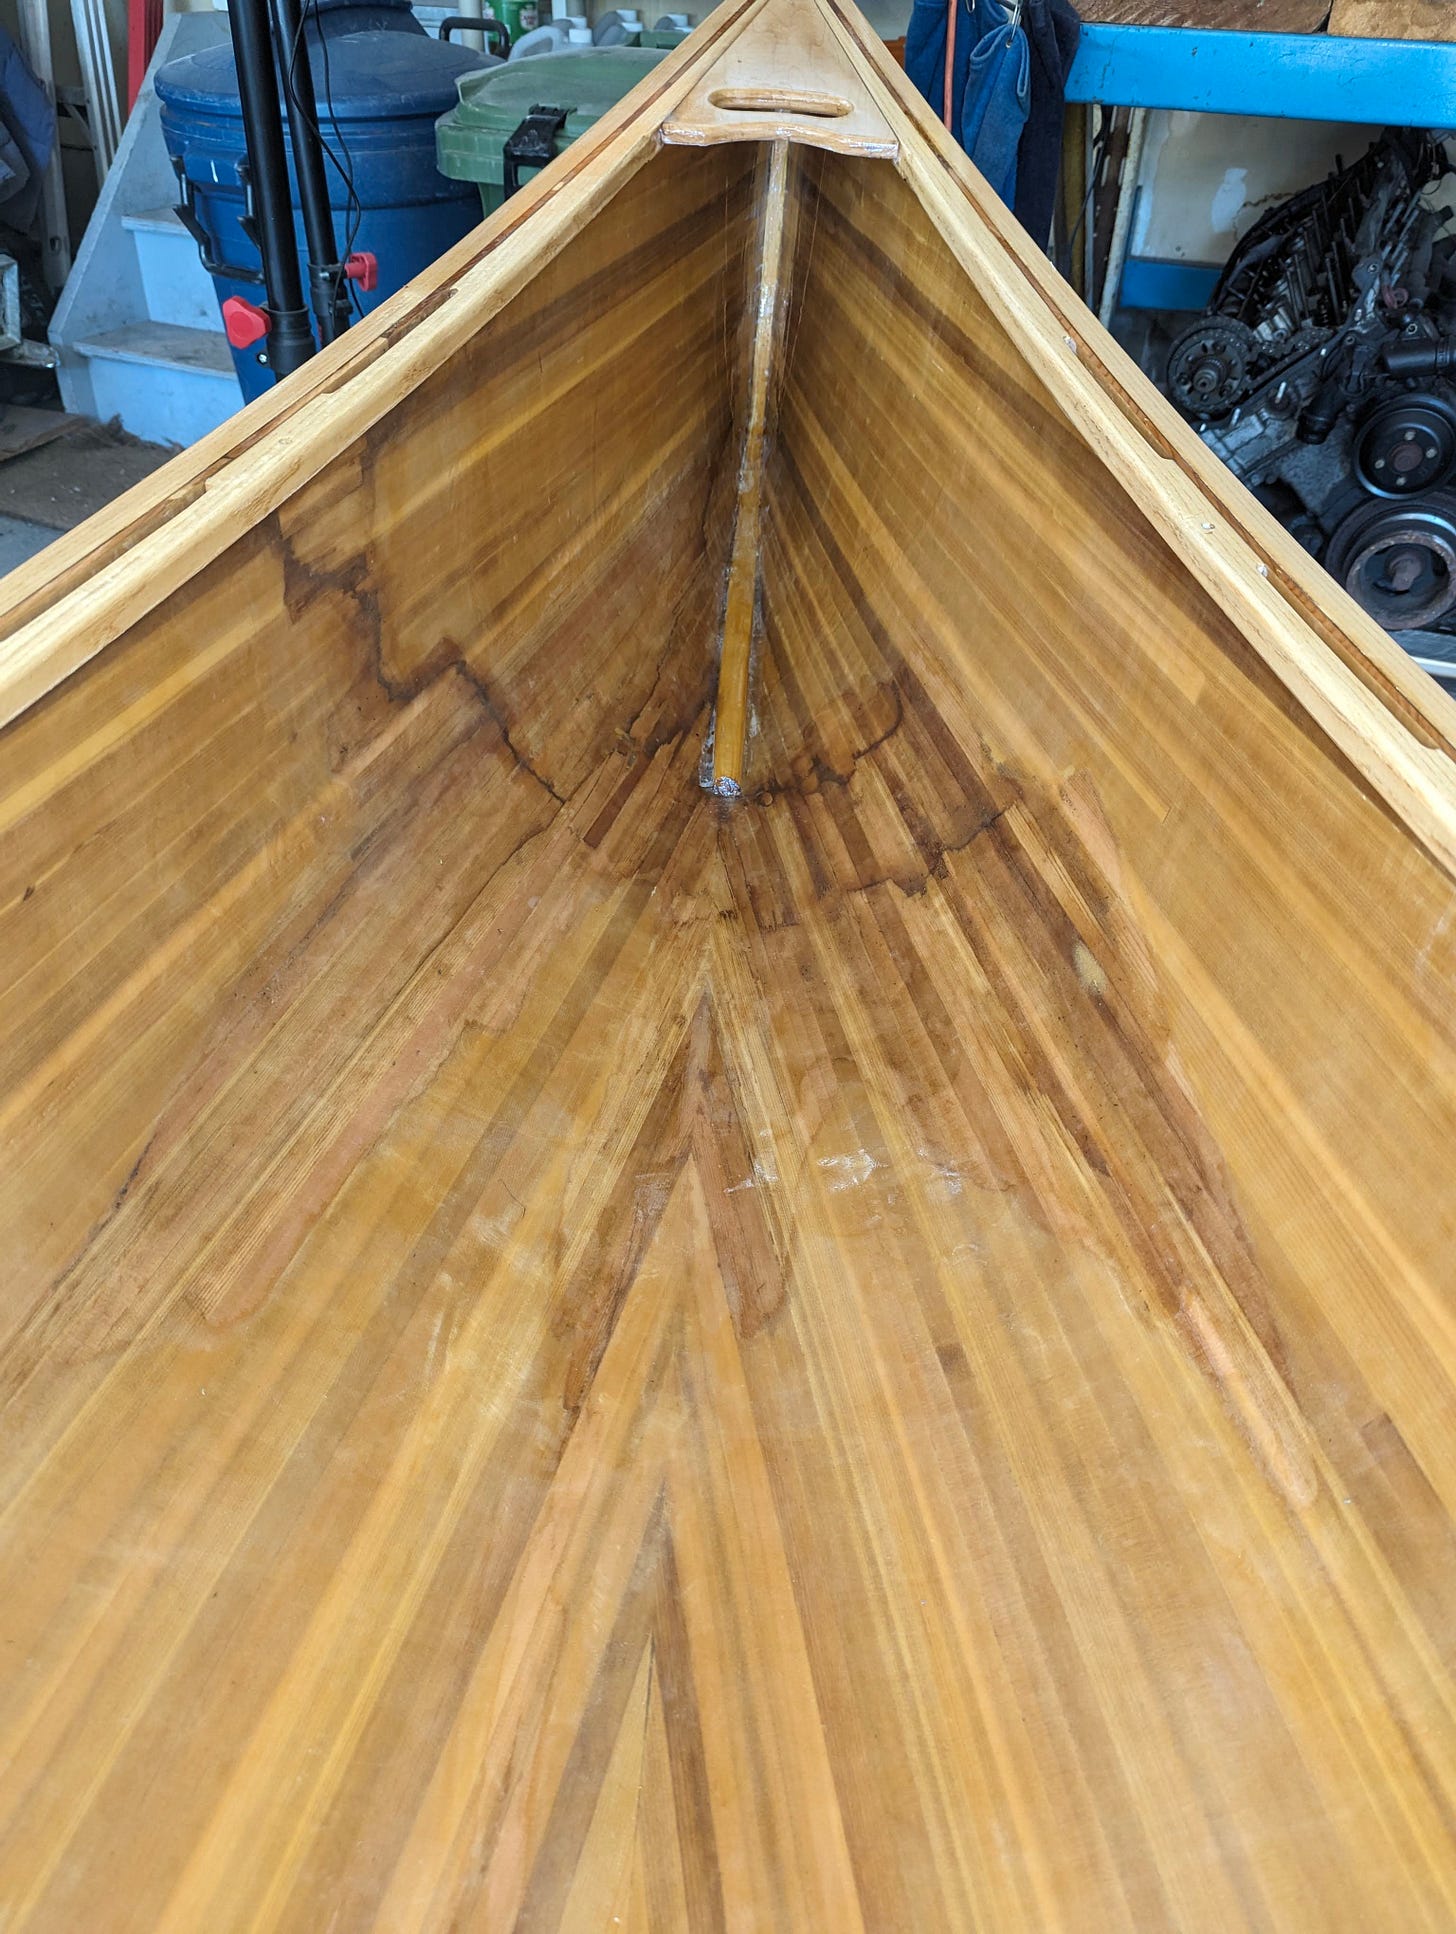
We used strips of fibreglass for most of the patches. In the bow, an extensive patch was required to cover all the damage in the interior of the canoe, so we used a large sheet of fibreglass in this section. I cut the fiberglass into a custom shape so that it would fit nicely around the stem and cover all spots where the original fibreglass had peeled away.
Reinstalling the trim
In March of 2024, Steve and I decided to sign up for the Mattawa River Canoe Race, which is scheduled for June 8th. This was the push we needed to finish up our canoe repairs!
With the fibreglass patches complete, ‘all’ that remained was to re-install the trim. This of course was a fairly involved process, as we had to make new gunnels and decks from scratch. Luckily, the yoke and seats from the original canoe were still re-useable.
Steve took the lead on making the gunnels and decks - cutting scuppers and rounding edges with the router, planing the ends down to fit nicely at the stems, applying protective coats of epoxy, sanding, and so on.
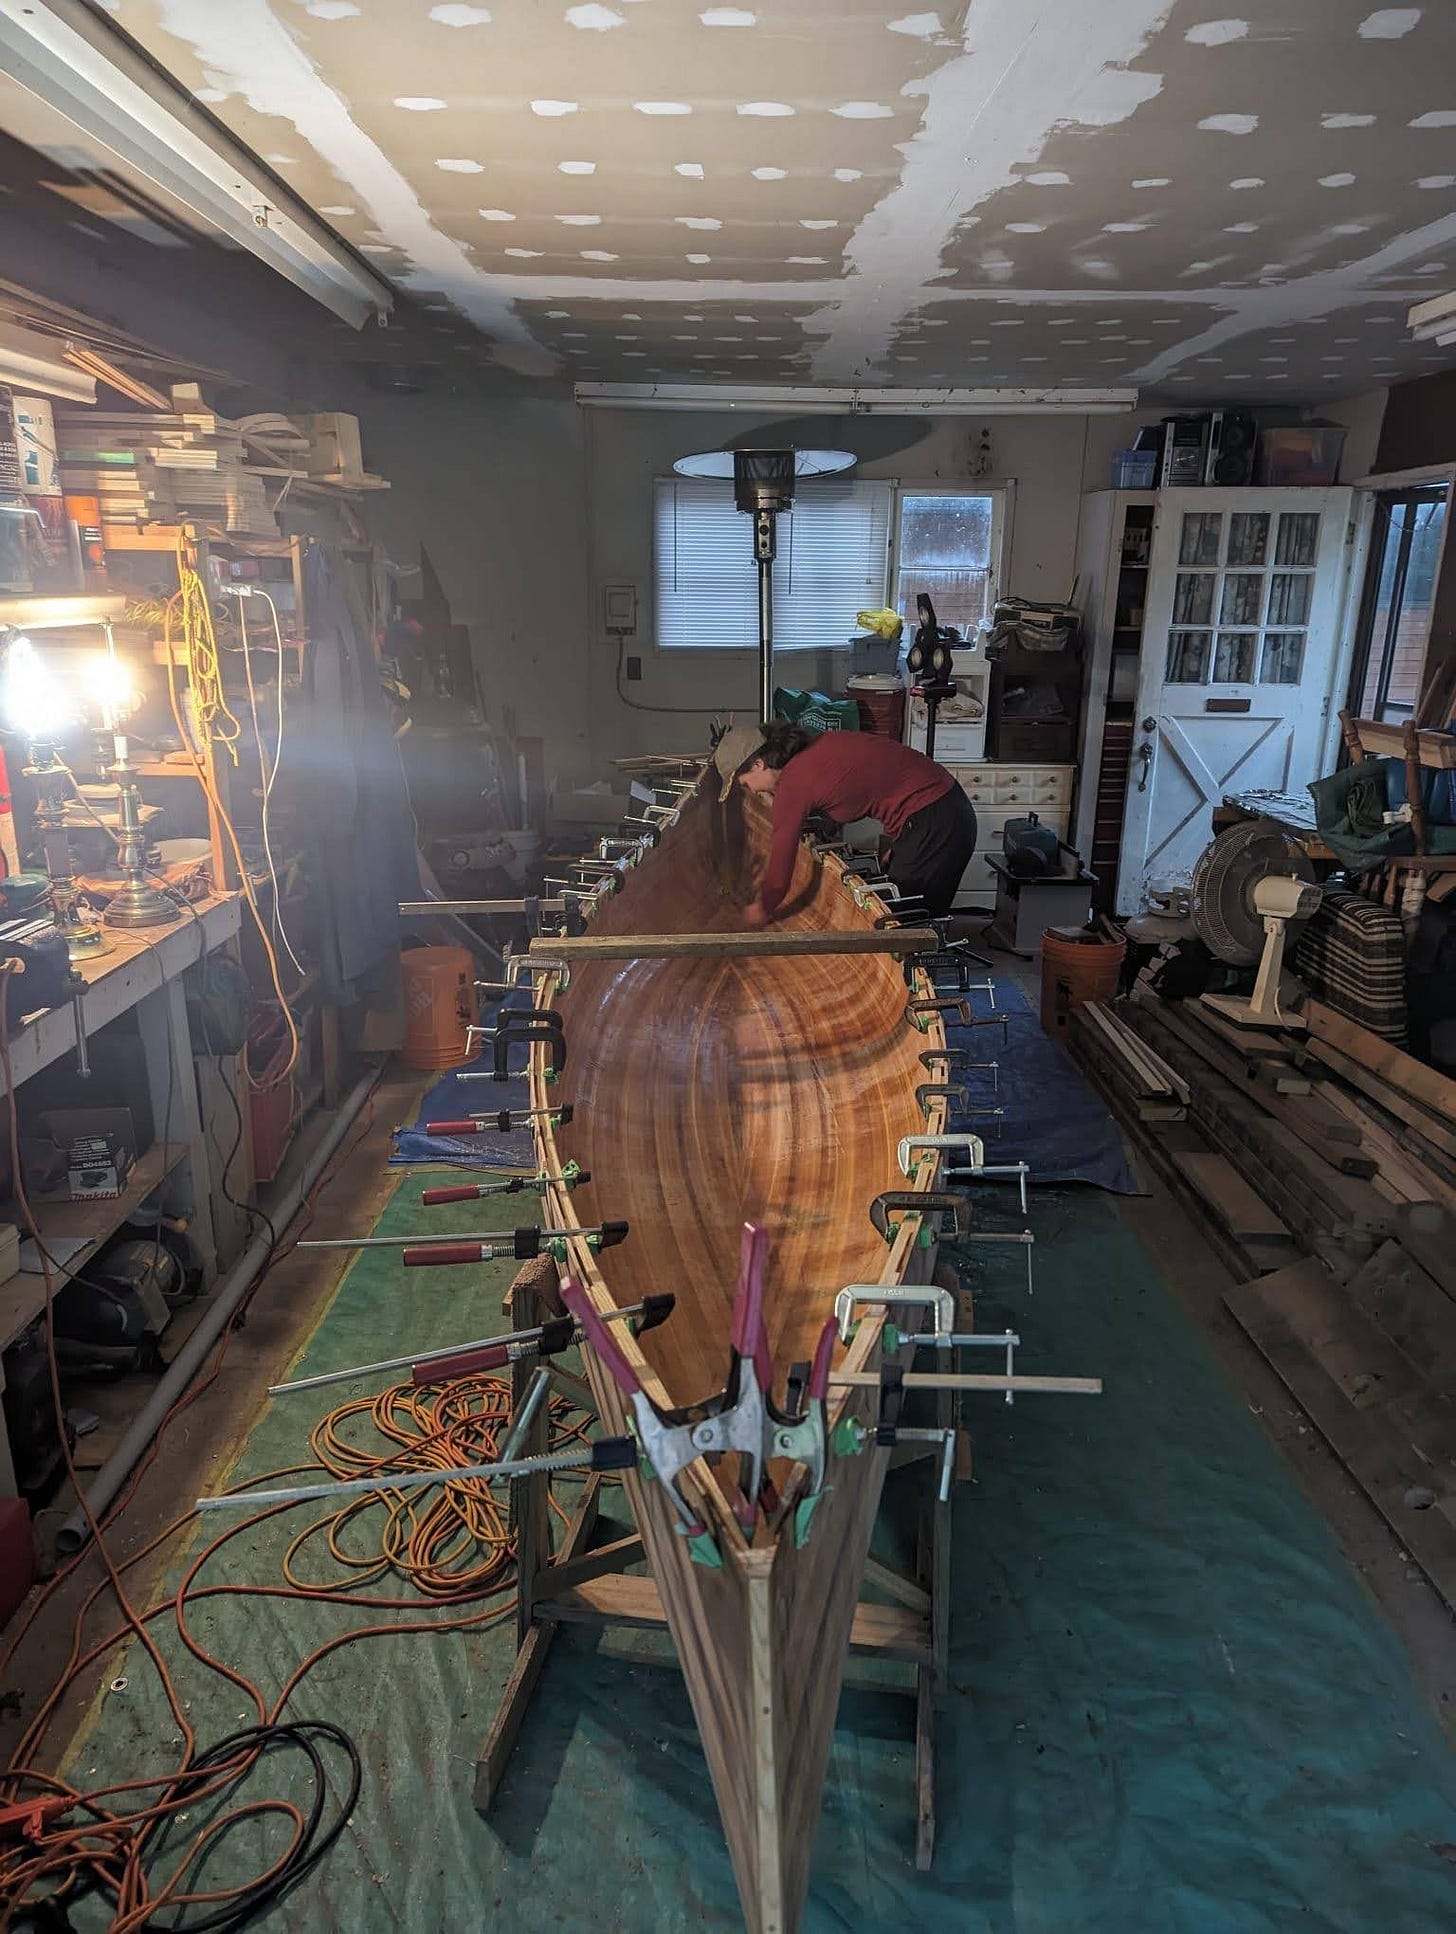
Then came the two person job of fitting the inner gunnels. First we did a dry fit, and filed down the ends of the gunnels until they sat perfectly along the length of the canoe. Then, we pre-drilled counter sunk holes for the screws, which go through the sidewall into the inner gunnels. With that all prepped, we did the real installation, applying epoxy to stick the gunnels to the canoe, as well as hand turning the screws into place. Many clamps are used at this stage.
The decks went in next. They are epoxied in place, and secured with more screws going through the sidewalls and inner gunnels.
Finally, the outer gunnels. The process for installing these is similar to the inner gunnels. First a dryfit and some hand-planing at the ends to get the gunnels to sit flush against the canoe. Then epoxy, screws, and clamps. The outer gunnels are a bit easier to install because the ends can be trimmed and cleaned up after the epoxy has set.
Finishing touches
With less than a week left to go before our race, we are completing the finishing touches on the canoe. We cut plugs and glued them into the outer gunnels to cover the screws from installation. Once sanded down, it gives a very clean finish.
The gunnels, decks, and sidewalls have been sanded flush, all gaps have been filled with sawdust and epoxy, and we are now working on applying coats of varnish. The inside of the canoe and tops of the trim have been varnished, and yesterday we flipped the canoe and worked on the exterior of the hull.
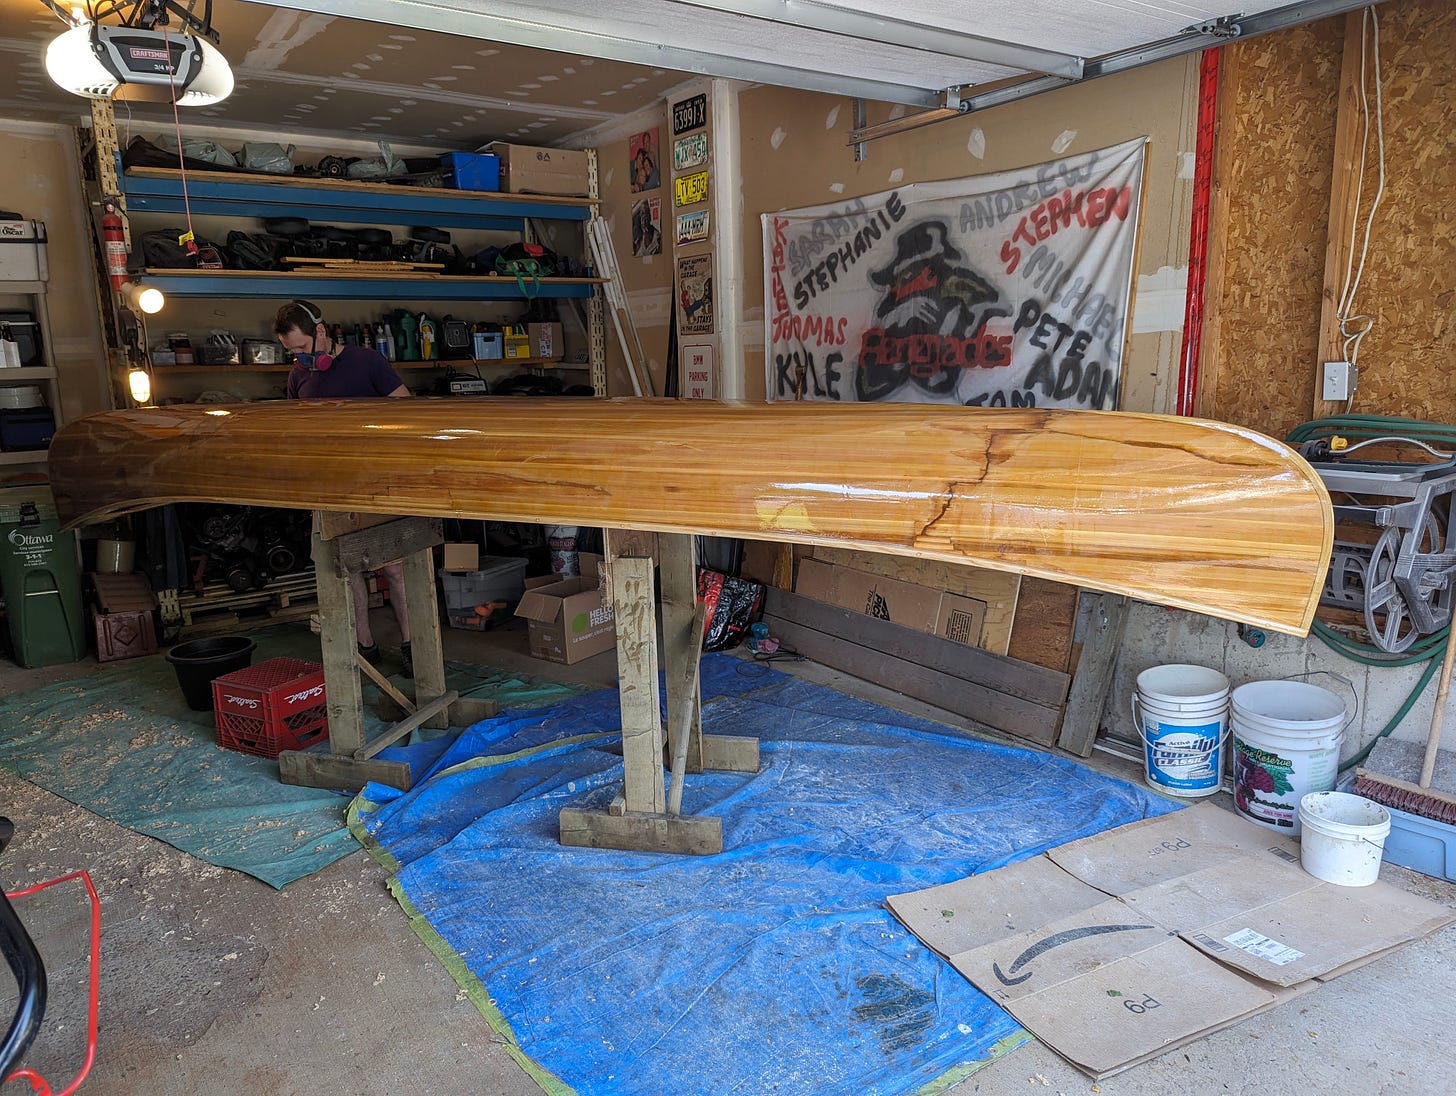
All that’s left is two coats of varnish on the exterior of the hull. We will sand the canoe before each layer, and leave it for a day to cure between coats. That should bring us to putting the final coat of varnish on likely this Tuesday.
It’s been a long road to get here, but it feels great to finally have the canoe ready to go out on the water again. We are very much looking forward to our canoe race next weekend, and all the trips that will come after. Here’s to a summer full of camping trips and breathtaking paddles in the backcountry!





Way to go!